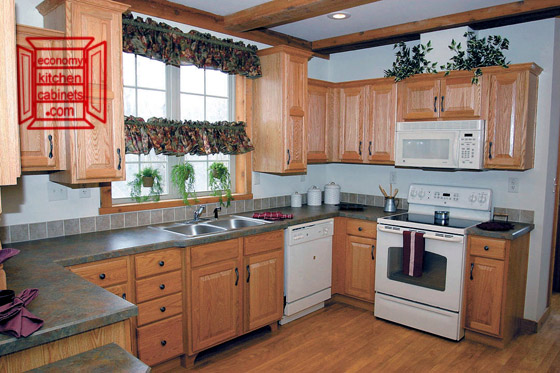
You should always aim to recycle your old cabinets to keep them out of the landfills. The best way to do this is by giving, or selling your old cabinets to someone else to use in their renovation. This won’t always be possible if the old cabinets are too damaged for use, but by being careful when you remove them, you can do your best to make sure that they at least have a chance.
For this project you will need:
- A partner for bringing down upper cabinets
- Screwdriver (or drill with screw bits)
- Flashlight
- A hammer and a piece of scrap wood, or rubber mallet
- Industrial solvent (if your countertop is glued down)
- Putty knife (if you need the solvent)
- Pry bar
Instructions:
- Take off Doors: Open the doors and remove the screws from the hinges on the door side with your screwdriver or drill and set them out of the way.
- Remove Drawers: Do a little bit of recon and look into how the drawers are attached. Pull the drawers out a ways and look underneath them with a flashlight at the hardware to find all of the screws you will need to remove. If you can remove the drawer, do so before taking out the screws, as it will be much easier to get to them to remove them. A good idea if you want to reuse the hardware is to put it into a container as you take it off for safe keeping.
- Take out the Sink: If your counter has a sink in it, you will need to remove it before going on to the countertops, if not, skip down to the next step.Get underneath the sink to locate any screws that are holding it in place and remove them. Next hit the sink from underneath with your hammer or rubber mallet to break the waterproof seal from the countertop.Note: If you want to reuse or recycle the sink use a rubber mallet, or hit a piece of board set against it with your hammer to stop any dents from being made.
- Remove the Countertop: For tile, wood slab, and plastic laminate countertops, all you need to do is to remove all of the screws holding the counter in place, and then pick it up and off of your kitchen base cabinets.If you have stone, concrete, mock stone countertops, or if yours is stuck to the top of the cabinets with glue, you will need an industrial solvent and a putty knife to remove the glue before lifting the countertop off. Use as directed on the package.
- Take off the Trim Molding: There are two ways to take off the trim molding that work nicely, although with the second one, you can save the molding for another project or another person.The first way is to simply work away an end of the molding with the nail puller on your hammer or with your pry bar and then strong arm the trim off of the bottom of the cabinets in one go. Then go back and remove the nails that remained in the cabinets.The second, and preferred way if you want your renovation to be as green as possible, is to remove each nail before you pull off the molding, that way it can be reused. It takes a little longer since you’ll have to fight with some of the nails likely, but in the end it’s worth it.
- Remove the Toe Kick and Base Molding: The toe kick is a piece of wood that is placed at the bottom of the base cabinets to hide any gaps that the cabinets may have at the bottom of the unit. Sometimes there is more molding on the front of it to remove before it can be taken off; this can be done with the process described in the last step.Once the base molding is removed, use your pry bar to carefully pull off the toe kick, once it has been removed, make sure to remove any fasteners (usually nails) from where it was attached.
- Separate the Individual Cabinets: On the underside of where the countertop was you will see a bunch of different pieces of wood running perpendicular to the wall. This is one area where the cabinets are attached, look around for any type of fastener and remove them. Follow the perpendicular pieces down the front, and across the bottom and remove any nails or screws found there too. Leave any going into the wall for now, and double check to make sure all of the other fasteners are removed.
- Remove the Cabinets from the Wall: Once the cabinets have been separated start removing the screws from the wall on the base cabinets (they may, or may not be fastened through a screw board), as you remove a cabinet, move it out of the way to make the others easier to access.For the wall cabinets, make sure that you have a partner to hold the cabinet up while you remove the screws from the back of the cabinet (or back and side on an end against two walls) this will save you a lot of trouble, as there is no danger of the cabinet falling on you as you take out the last of the screws.
- Pat Yourself on the Back: For a job well done.
Things to do with Your Old Cabinets
Sell Them Many of the places where you can purchase your used kitchen cabinets are the same places that you can sell them. Craigslist, Facebook groups, eBay, friends, family, friends of friends, coworkers, and coworker’s friends are all good places to sell your old cabinets. If you are planning on selling cabinets, you can gain some extra money with some simple maintenance like making sure to lubricate drawer slides, adjust hinges, replacing hardware, and maybe even adding bumpers to the doors.
Give them Away As I said before, your friends, family, or coworkers will likely know one of their friends who are doing their own kitchen renovation. If you’re wily about it, you can even get them to give you a hand taking the cabinets out. A little elbow grease is a good payment for some free cabinets on both sides of the deal.
Donate them reStores and thrift shops which offer furniture or anywhere that used kitchen cabinets are for sale are great places to donate your items, and most times the money from them being resold goes to a good cause.
Homeless shelters that are remodeling can do a lot more with their budget if people donate materials like this to them. Even if they aren’t remodeling they might take them off your hands anyhow if they are planning on it in the future.
High school art and shop classes might not be the most obvious place to donate old cabinets to, but many will take them so the students can turn them into other, workable pieces. A shop class may even take some that are in poor condition so that the students can learn how to repair them.
Give them a New Purpose In my shed I have three cabinets, all of them are a different color with a different pattern on the doors and drawers. They are beat up from constantly having tools and things hit against them, and they’re hideous. I wouldn’t have it any other way, those cabinets and drawers have saved me so much time searching around in that dimly lit room that I wouldn’t change them out unless something catastrophic happened to them. Used cabinets could be used in other rooms of your house as well if they are in good shape, the garage or basement may be the perfect place for some cabinets.
You could drill some drainage holes in the bottom of some drawers, give them a colorful paint job, put in a plastic liner, fill them with soil and flowers, and place them out in your garden as a focal point. Since they don’t take up a lot of room, you could place them around painted different colors in larger gardens to give a neat look, for something extra, try stacking three in a pyramid shape.
You could use whole cabinets and a countertop as a planting area for your garden. My neighbor has some coming off the side of his shed sitting on patio blocks on an otherwise gravel patch. All he did was add some door stoppers so the wind wouldn’t rip his doors open and he paints them ever few years to keep them from rotting and they work great for him and his wife.
Some other ideas include using cabinets on your outdoor walls as a vertical planter, or indoors as a closet organizer, entryway storage, under stair storage, cubbies for kids’ toys, extra storage for a home office, a headboard, rolling cart, or craft supply storage center. You are really only limited with what you can do with old shelves by your imagination and skill level with projects such as this, and anything you do with them to keep them out of the landfill helps everyone out.
Photo by Grant McLean